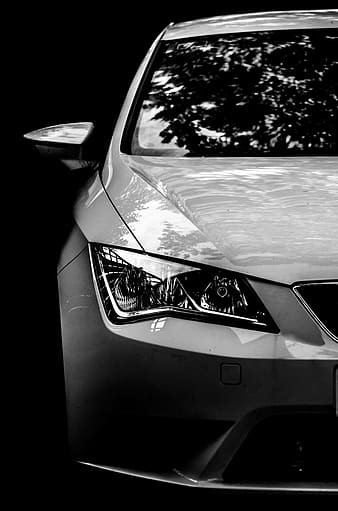
Headlights can either make or break the look of your car. They are the products of meticulous craftsmanship and advanced vision technology combined together to deliver breathtaking aesthetics and stunning night for drivers and owners alike. Headlights perform two main functions which include seeing other vehicles, objects and pedestrians on the road as well as to let other driver’s see you driving on the road. Considering their essential role in car driving experience, headlights are one of the main things to look after in your car. However, with time, car headlights tend to lose their luster and in such cases, they demand heavy car detailing and damage restoration.
Want to learn everything there is to know about headlight damage and restoration? Read on to learn how to clean headlights and best practices for restoring headlights in vehicles.
Signs of Headlight damage
Vehicles headlights are destined to lose their look over time and use. Although precautionary steps can setback the timer of headlight damage, these car components will ultimately show signs of wear and tear. In some cases, the headlight damage is mainly because of mechanical or chemical reactions. While, in some cases headlight damage may arise from technical issues.
Some of the most common signs of headlight damage in cars include:
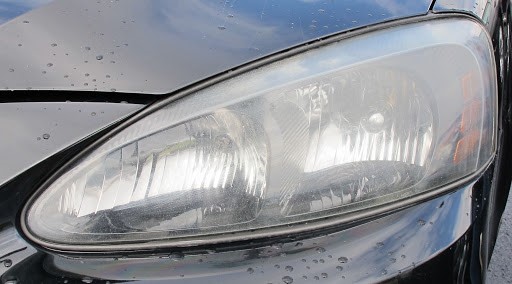
Yellowing
The plastic of headlight lens will start to turn yellow and hazy over time. It will block the powerful light beam and cause greater refraction of light. Thus, it will disrupt light clarity, sharpness and vision range.
Scratches and Chips
If you drive your car recklessly on bumpy roads or near construction sites, your car’s headlights are susceptible scratches from hitting surfaces and chips from rock and pebble impact at high speeds.
Bulb Issues
In some cases, your car headlight’s bulb will start to dim over time. If your car vision is not considerably improved even after performing headlight restoration, there are high chances that there are issues with the headlight bulb. In such cases, you will have to take the car to its manufacturer to purchase new bulbs.
What causes car Headlights damage?
Headlights are composed of polycarbonate plastic material. Although it is a strong plastic which can withstand bumps and harsh road conditions without cracking, it does not go well with sunlight. Unfortunately, your very tough headlight polycarbonate plastic is very susceptible to direct heat and UV damage from long hours of headlight exposure to direct sunlight. The UV rays and heat cause disruption in the plastic composition and the damaging oxidation process initiates. Consequently, you are left with car headlights which have either turned yellow and hazy or have begun cracking. In conclusion, the following factors are main reason behind car headlights damage:
- Oxidation of polycarbonate due to
- UV Damage
- Heat Damage
Why is Headlight Restoration Important?
Headlights are one of the most important parts of your car’s exterior and build. If you are responsible and experience car owner, you will know just how much of a role the condition of headlights plays in determining how you drive on the road. When it comes to driving with poor headlights, you are not only putting your life at stake but also risking other people’s safety. Many people neglect the car detailing aspect of auto headlight restoration which can actually save them in countless situations.
Here is why headlight restoration is important
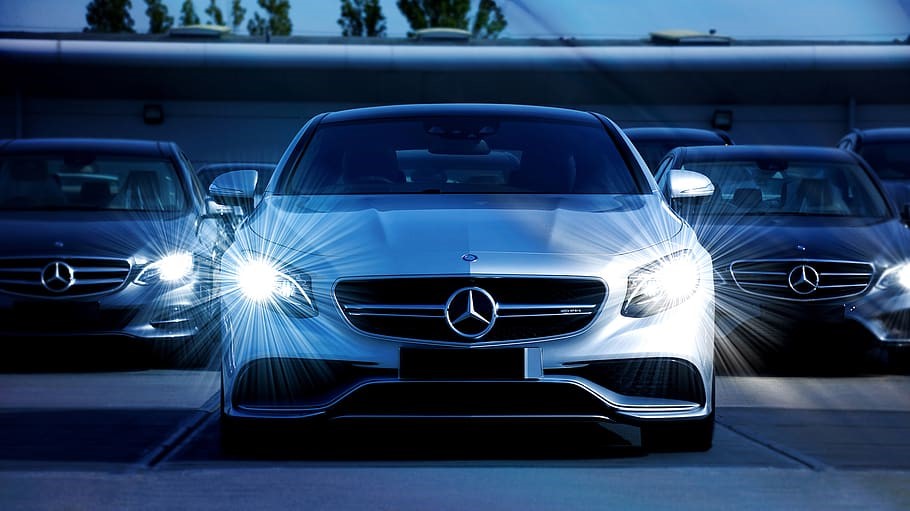
Appeal of the car
Compare the headlights of a brand new car and the headlights of a car driven for at least one year. You will notice visible differences between the look of both cars. Car headlights are designed to impart aggressiveness to car build as well as to help the car stand out from the crowd. Clear and clean headlights not only highlight the front features of the car but also improve the appeal of the overall exterior. You can easily turn heads wherever you go by driving a car which has shiny headlights at the its front. Well-maintained headlights are also a direct reflection of how organized and responsible you are as a car owner or car driver.
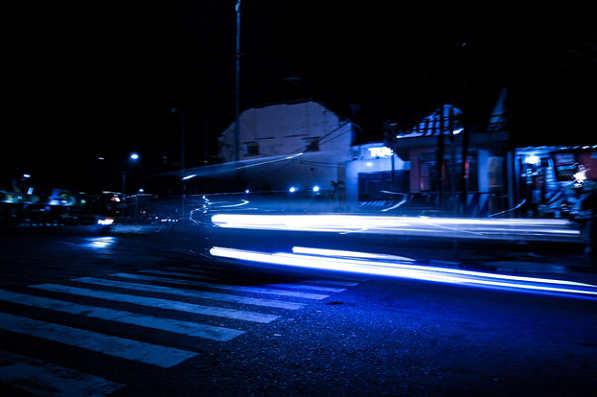
Range of vision
Light has different speed of travelling through different types of mediums. Just like all other plastics, the polycarbonate used in the headlight lenses also has a considerable degree of light refraction which helps in light beam dispersion from the source to the target road in most cases. Once your headlights are hazed or yellowed down because of oxidation, the refraction angle will also increase and you will begin to lose the clarity of the light on the road at night. Poor headlights not only deteriorate the range of vision of headlights for the driver but also pose serious threats to car’s safety.
Car Safety
When your range of vision gets limited on road, there are high chances that you will either hit the blocks or pedestrians or crash with other motorists and get stuck in ditches. Yellow and dirty headlights will also prevent your car’s light to be shown to other drivers and they may hit you while driving at fast speeds on the road. Headlight restoration is very important to boost car safety so that you don’t get hit or hit someone during preventable accidents.
Maintaining resale value
Did you know that cars which have aesthetically appealing design elements, including headlights, get better resale values? The minute you remove default headlights and replace them with new ones, the resale value of your car deteriorates. However, if you want to maintain and improve the resale value of your car, the best way to go is to get a professional headlight restoration rather than purchasing new headlights by spending hundreds to thousands of bucks.
Factors effecting Car headlight restoration
Car restoration depends upon many factors such as the method adopted for headlight restoration, condition of headlights during restoration, the types of materials you use and the kind of shine you want to get on your headlight at the end of car headlight restoration. Just like all other car detailing procedures, there are no hard and fast rules to follow in headlight restoration as well. Since it is one of the delicate car detailing aspects, restoring headlights shall be done by doing proper research, watching tutorials and getting the best equipment you can buy before initiation. Remember that being careful will cost you nothing, whereas, new headlights will cost you hundreds to thousands of bucks.
Things you Need for Headlight Restoration
Car headlight restoration is a systematic process which involves the use of top-quality materials, compounds and best restoration techniques to deliver the best results. Instead of making situation worse by forgetting headlight restoration material and techniques, it is best to purchase and prepare the material before starting the actual restoration process.
Here are the main things you will need to perform basic car restoration:
- 2500 Grit Sand Paper
- 3500 Grit Sand paper
- Painter’s tape
- Microfiber towels
- Hand-help drills
- Flat drill backing plate
- Orange Cutting pad
- V34 – Mild Abrasive compound
- White wool drill pad
- V36 – Moderate Abrasive compound
- Clear Coat/Car Sealant
- Water Spray
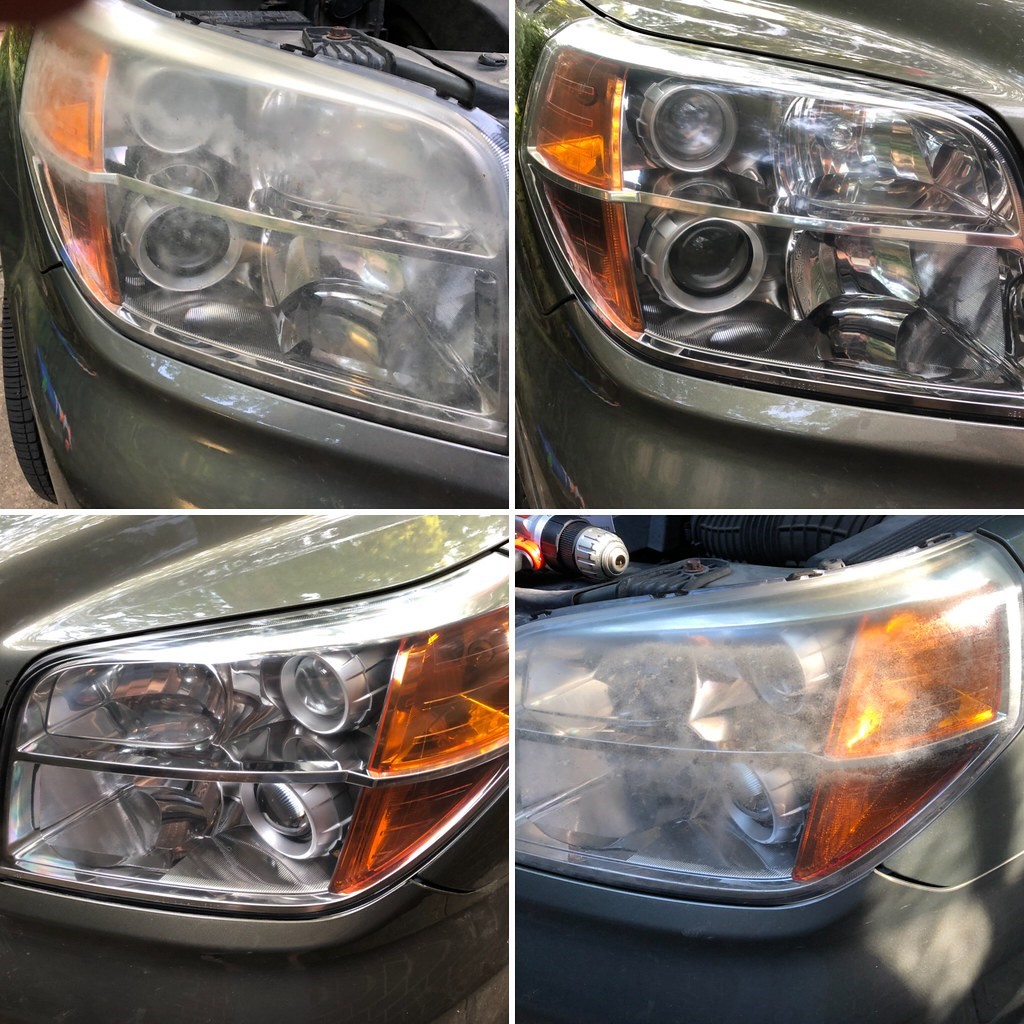
Basic Steps to follow to do a Headlight Restoration
Are you ready to take a look at the basic headlight restoration process? Let’s dive in to learn more about car headlight restoration process
Remove Bonnet and Apply Tape
Most of the headlight tops are partially covered with car bonnet which can get damages during the next steps of car headlight restoration. Therefore, remove the bonnet to get a clear look of headlight edges. Use a painter tape to cover the edges of the headlight from all the sides for the sake of protecting the car parts from scratching and compound damage.
Clean the Headlight
Use spray water or isopropyl alcohol to soak the headlight. Use a microfiber towel to wipe the headlight and remove any kind of dust, grime or contaminants which may be sticking to the surface of headlight. Clean your hands once you clean the headlights and put away the dirty towel.
Wet Sanding
Wet sanding is the heart of headlight restoration and here is how it is done:
- Use a spray bottle to apply thin water layer on the headlight.
- Take a 2500 grit sand paper and wrap it around flexible sponge
- You can also use a sand paper strip and attach it to one side of sponge
- Wet the sand paper and start rubbing it on the already-soaked headlight
- Rub the sandpaper in horizontal or vertical direction – one direction at a time
- Continue spraying more water and sanding the headlights until a milky residue starts to trickle down the headlight surface
- Clean the head light using a microfiber towel
- Repeat the process 2-3 times
- Once the headlight starts to develop a uniform haze, take the 3500 grit sand paper and repeat the wet sanding process
- Alternate between vertical and horizontal sanding motion to balance the scratches
- Stop sanding once the haze is gone and you can see the car bulb and other components
- Wipe the headlight using a clean microfiber towel

Apply Car Polish/Abrasive Compound
This is where the magic happens! Once your headlight is cleaned from the dead plastic residues via wet-sanding, it is time to apply car polish to the headlight. Here is how it is done
- Take a hand drill and attach a flat drill backing plate
- Take the orange cut sponge and place it on the backing plate
- Pour three drops of abrasive compounds (V34 after 2500 grit wet sanding and V36 after 3500 grit wet sanding)
- Dab the compound all over the lens and mix it well by turning on the drill
- Do not keep the working drill in one place for long time as it will cause overheating of the headlight lenses
- Use a clean microfiber towel to remove any residual compound from headlight
Apply UV Sealant
Once you are done with polishing the headlight, you will immediately witness a brand-new shine on your headlight. Now, it is time to protect the newly restored headlight so it can withstand UV damages on your next ride
- Take a headlight protective sealant and spray it over the headlight lenses
- Let the coat dry for at least 2-3 minutes
- Apply another coat of sealant and let it dry for at least one hour
Test It Out
Once you have performed all the steps, take the car out for a test run and see if the visibility has improved. If there is anything missing, start sanding and polishing again or seek professional help.
Alternative ways to protect your newly restored headlights
Ask two auto detailers about head light restoration final steps and they will give you two different answers. Don’t worry, you do not have to get confused due to the abundance of choices and variations. There is more than one way to protect a newly restored headlight. Once you get a clean headlight after completing the headlight restoring process, you can consider following ways to protect the headlight from further UV and heat damage:
Use a UV Hard Coat
UV hard coats offer special protection against the UV damage and they bind to the headlight surface as a thin layer. They are usually available in commercial quantities and carry OEM approvals by the manufacturers.
How to apply
- Clean the headlight with a dry towel after restoration
- Cover the bonnet and surrounding areas of the headlight using a plastic sheet and painter’s tape
- You can use a professional grade spray gun to apply a thin coat of UV hard compound on the headlight.
- Use a UV lamp to dry the coat and ensure even application
Pros of UV hard coat
- Offers most protection against UV ray damage to the cars
- OEM approved, professional grade protective layer
- Lasts up to 5 years
Cons of UV hard coat
- It is very expensive and extra product usually goes to waste
- It takes a lot of time and preparation for its application
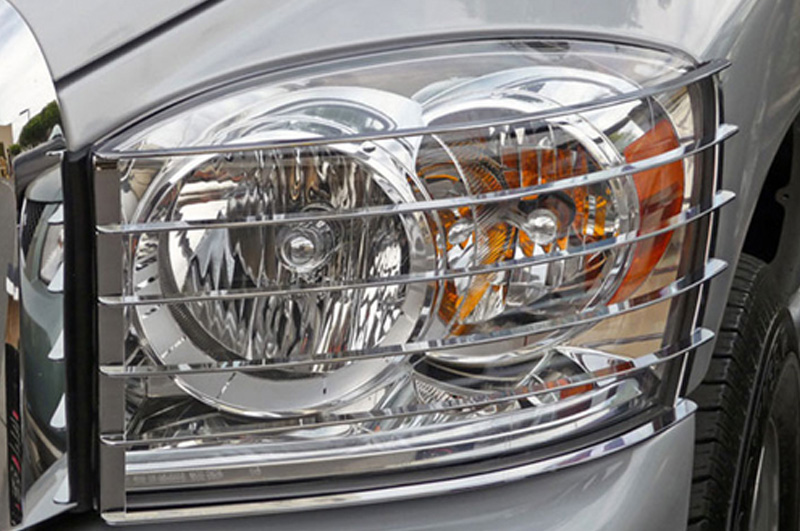
Install Headlight Guards
Headlight covers will be one of the most unique yet not-so-surprising thing you will see in our list of headlight protection alternatives. They are actually headlight-shaped polycarbonate pieces which have attachments on the side.
How to install
- Clean the surface of headlights using a microfiber towel
- Screw down the headlight covers exactly over your headlights
- Clean the headlight covers and maintain proper gap
Pros of Headlight Guards:
- Easy to install and easy to remove
- Does not bind with the headlight surface
- Offer amazing temperature regulation
- Very resistant to UV rays, rock chips and impact damage
Cons of Headlight Guards:
- The gap between headlight and the guards can lead to yellowing of the edges
- The extra covers may look tacky and damage car appeal
Apply Acrylic Clear Coats
Acrylic Clear Coats are available in the market in the form of rattle bottles. You can use the lacquer technique or clay bars as an alternative to these clear coats. Professional do not recommend the use of Acrylic Clear Coats for headlights.
How to install
- Clean the surface of headlights using a microfiber towel
- Spray a thin layer of Acrylic Clear Coat on the headlight
- Let the coat dry for a few minutes
- Apply another coat and let it dry evenly
Pros of Headlight Guards:
- They offer good resistance against UV damage
- Lacquer mixed clear coats are resistant to rock chips and impacts
Cons of Acrylic Clear Coats:
- Acrylic Clear Coats start to peel just after a year of application
- They have a very high refraction index and damage the clarity and sharpness of light beams
Use Headlight Protection films
Headlight protection films are one of the most favorable headlight protection methods to consider.
What will you need?
- Squeegee
- Isopropyl alcohol
- Water spray
- Microfiber towel
- Soap water spray
- Blow dryer or heat gun
- Razor/cutter
How to install it
- Spray soap water on the headlight
- Use a microfiber towel to clean and dry the headlight
- Wash your hands before picking the film
- Cut bigger film into smaller pieces (larger than headlight) pieces
- Again, spray the headlight and protective film with water
- Carefully Place the film on the headlight and use a squeegee to squeeze water
- Move from one point to the end of headlight and so on
- Spray more water on peeling edges and simply drain it using a squeegee
- Use a heat gun or a blow dryer to eliminate any excessive moisture
- Cut the excessive film using a razor blade
- Use a dry towel to clean the film for the final step
Do not worry about any water bubble which may be left between the film and headlight surface as these films are breathable and the water drop will automatically dry in a few days.
Pros of Headlight Protective films:
- They can last upto a considerable period of 5 years
- Headlight protective films simply add a thin layer of protection on the headlight. There is no binding between the layer and surface of the headlight
- The headlight protective films are very easy to remove as you can simply peel them off starting from one end to the next
- These films are breathable, maintain tolerable heat on the headlight surface and offer protection against rock chips and excessive UV/heat exposure
Cons of Headlight Protective Films
- These films are bit hard to install and take a lot of time to remove any creases and water bubbles
- These films are Expensive car detailing options
Use After Market headlight coating
After market headlight coating are also available in the form of spray bottles and rattle bottles. You can apply two coats of these compounds on the headlights by allowing alternating drying period between the consecutive sprays. The main disadvantage is that the headlight coats last for only a year.

Tips to improve the lifetime of your headlights
Headlights have an average lifespan of 2-3 years after the purchase of a new vehicle. After this duration, most of the headlights start to damage rapidly. The good news is that you can follow effective tips to protect the headlights before and after restoration and boost their lifespan:
Watch Instructional videos
Watch product manufacturers’ instructional videos or read guides before using any kind of product on your headlights.
Examine lens before purchasing
Before purchasing a lens protection kit, analyze the condition of your headlight thoroughly. If your headlight appears to be clear, there is no need to use a restoration kit as it will lead to abrasion and scratches of a perfectly fine headlight lens.
Consider getting new bulbs
When headlight restoration fails to improve light intensity, it is time to invest in light bulbs. Headlight bulbs dim after a few years and you will have to purchase new ones.
Clean Headlights Regularly
Develop a habit of cleaning headlight lenses with domestic grade glass cleaners so you can minimize the wear and tear from snow, ice or salt.
Protect headlights from direct-sunlight
When headlight restoration is complete, do not drive the car outside for at least an hour to protect it from sunlight and UV rays.
Do not delay headlight restoration
Remember that when it comes to headlight restoration, the earlier is the better unless you want to crack the lens and spend money on expensive headlight replacement.
The Bottom Line
Your car’s headlights determine your safety and others’ safety on road during night time driving. If you notice yellowing, hazing or scratches on the headlight lens, it is time to go for a headlight restoration immediately. You can either purchase the products and do it at your home or book professional Mobile Car Wash headlight restoration experts to do the job for you at the time and place of your choice.