There’s always a great deal of information out there in the world about cleaning your car’s painted exterior surface, as well as how to look after your carpets, upholstery and even the leather on your steering wheel. The one area that seems to be somewhat more neglected is that of glass surfaces in the car.
In today’s blog, we’re going to look at different glass surfaces in your car, how to clean them properly and, more importantly, how to protect them just as well as your paint needs to be protected.
Background: How Much Does it Cost to Replace Your Glass?
Let’s say that you haven’t looked after the glass surfaces well and you then feel you need to replace them. How much would that cost? Obviously it does depend on the exact car you are driving, but here are some real-world averages:
- Front windshield – $100-400
- Door windows – $100-400
- Rear Window – $200-450
- Side Mirrors – $139-328
- Rearview Mirror – $4-650
- Infotainment Screen – $300-500 for repair, and possibly thousands for a replacement unit
- Headlight Housing – $250-750 (it’s not glass, but has a glass look)
Benefits of Cleaner Glass Surfaces
First of all, though not the most important factor overall, cleaner glass simply looks much nicer. Why would you take all the time to get your car’s paint popping and shining with vigor and glory, just to leave the glass looking dusty and tired? To complete the effect of a car detailing, then it becomes necessary to also include the glass in that.
More importantly, however, the benefits of having cleaner glass surfaces lay in the realm of safety. The fact is that poorly cleaned glass means reduced or otherwise impaired visibility. Even things that are not dirty but clutter or block up your windshield, for example, are very dangerous. If you don’t turn on the fan, and the windshield starts to fog up, for example, that can be extremely dangerous, even if only part of the window is fogged.
Clear and total visibility through all of the windows is essential for absolutely safe driving. That’s why we’re going to talk about how to clean the glass properly, and protect it.
Looking After Exterior Glass
In this section, we’ll cover the cleaning, decontaminating and protecting of your vehicle’s exterior glass surfaces.
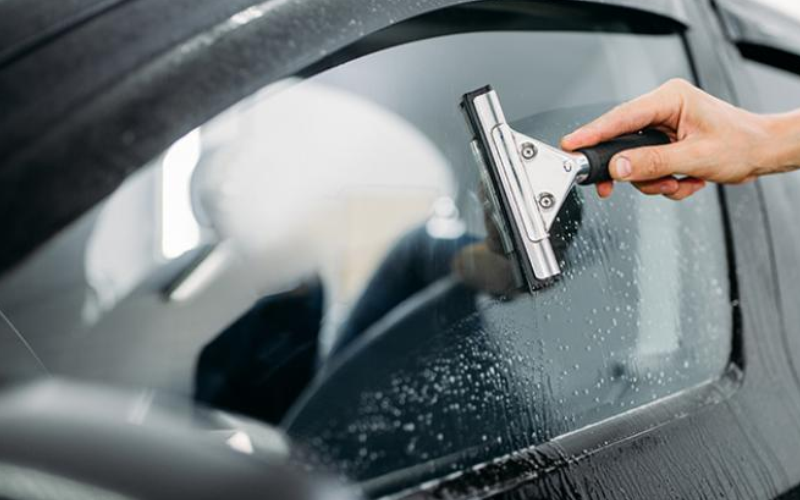
Cleaning Exterior Glass
The first thing you need to do is to invest in high-quality cleaning products for the glass. Brands like Chemical Guys are often a good bet, but you can likely find many items on platforms like Amazon.
Can I Use a Regular Window Cleaner?
Most of our homes have products to clean windows and glass surfaces in our homes. Windex is arguably the best known one, so why not just use that on your auto glass? Believe it or not, household glass cleaner is not an ideal product to use on your auto glass, and there are good reasons for it. Just as you wouldn’t use dish detergent or bleach to clean your car’s surface, these household glass cleaners are not well suited to auto glass. Here’s why:
1. They leave streaks. On auto glass, household window cleaners are more likely to leave streaks on the surface, which of course presents some problems when it comes to visibility and safety. Even a single streak down the driver’s line of sight can prove dangerously distracting. Besides streaks, they can also fog and create glare on the screen.
2. They’re not good for your tint. A lot of people now like using tinted windows, but the problem is that household window cleaners are likely to be ammonia-based. Ammonia can start to break down your glass tint, and even cause it to start peeling and becoming unsightly. Car-friendly products don’t use ammonia as an ingredient.
Ammonia will emerge again as a dangerous ingredient for car cleaning, especially when you’re dealing with your car’s infotainment screen. The best alternative is to use alcohol-based products
While we’re on the subject of proper cleaning equipment, if you’re using a sponge to wash the rest of your car and a towel to dry it, then you don’t want to use these for the window cleaning part of your job. Both can be abrasive on the glass and can also break down tint or other special surfaces that you have on the glass. Use soft microfiber towels instead.
Cleaning Procedure
As your chosen cleaning product directs, spray it onto the glass while the windows are closed and then wipe off with clean, soft microfiber towels. The impact of the cleaning should be almost instant, with the glass looking clearer and more brilliant.
If the window has been really caked in a layer of mud or dirt, then you’ll need to wash that excess dirt off first using a power washer and your regular car shampoo. Clean off the excess dirt and get the windows looking at least dirt-free. The extra sheen is then added by the other cleaning product.
Once you’ve cleaned the outside, open the door and clean the inside of the glass. For the car door windows, don’t forget to have the windows fully extended upward and also to clean the tops of the windows. A lot of dirt, grime and dust can build up in that tight hiding place in which glass normally sits.
For the other interior glass surfaces, we’ll share more in the next section. Next, let’s look at decontaminating the exterior glass.
Decontaminating and Protecting Exterior Glass
This isn’t a step that you’ll have to do every single time. If your windows have been long-neglected, however, then it’s a very positive step to take. You can first restore the glass with proper cleaning, but then also you should look next to glass polish for any lingering stains.
One great example of effective glass polish is that made by Vision. Vision and similar polishes are not just good for removing stains from the glass, but can also be used to clean right down to the molecular level. When applied well, polish will go as far as to clear out the tiny recesses that you would only see in the glass if you put it under a microscope. It’s in these recesses that the most stubbornly embedded dirt is to be found. Polishes like Vision act in a similar way to the detailing clay getting tiny flecks of dirt out from their deep-rooted position in your painted/clear coated surface.
This isn’t just a thoroughly deep clean for the glass, but it also makes the glass surface somewhat hydrophobic again, so it’ll stay bright and clean for longer. That’s the added protection you get when you use glass polish. You can apply it either by hand or using a dual-action polisher, whichever you think you need to get the job done right.
You can further enhance the hydrophobic effect by applying a silicon dioxide coating to the glass surface. It will chemically bond with the top layer of glass and act like a ceramic coating on the car’s paint. It’ll fill up those recesses, too, to ensure that dirt can’t get back into them again.
Here’s how Chemical Guys are protecting their windshields using HydroSlick:
Looking After Interior Glass
In this section, we’ll cover the how to handle interior glass surfaces:
Rearview Mirror
You can use your car-friendly glass cleaner on the rearview mirror, ensure that you apply and remove evenly using a clean, dry microfiber towel to get the job done. The rearview mirror having total clarity and visibility is essential. As with the windshield, even a single streak can cause a lot of problems for the driver.
Windshield and Rear Window Interior
Use the same process as you did when cleaning the exterior, but you’ll have to be careful of any interior obstacles. If you have documents or things displayed in the windshield corner, for instance, then you’ll need to be aware of those when you’re spraying your cleaning product. Try also to avoid getting the auto glass cleaner on your instrument display and in your dashboard fans. It’s not the end of the world if a little solution goes astray, but it’s still best avoided.
One tricky thing with the interior windows can be reaching them to clean them evenly. There are some awkward angles when trying to reach the far corners, and depending on what kind of car you’ve got, you might be better off cleaning the rear window by opening the tailgate if it’s an SUV, or if it’s a hatchback. On a sedan, however, you’ll just have to reach from the back seat. Below are some more tips on interior windshield cleaning:
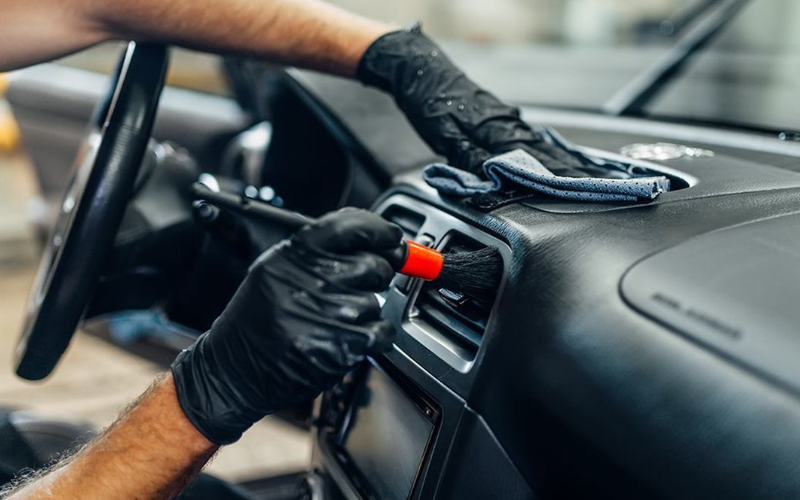
Infotainment Screen
Finally, we come to the infotainment screen. This is the bit of glass that many people like to forget about. We don’t always think of a screen that’s normally loaded with our entertainment and navigation content as being just another bit of auto glass, but technically it is.
Infotainment screens have one enemy, and it’s one that we’ve mentioned elsewhere in this article — ammonia. Obviously, with the infotainment screen you don’t want to go attacking it with a wet soapy sponge, but it does get touched all the time and therefore regular cleaning and decontaminating — especially in the wake of COVID-19 — is essential.
First, we recommend using either a very small, fine microfiber cloth, or even a glasses lens cloth if you have one spare. You can actually find dedicated screen-cleaning solutions that are safe to spray on the screen or on the cloth, but if you can’t find one, you’re okay to use a regular cleaning agent so long as you use it sparingly and it doesn’t contain ammonia.
The best way to clean the screen is simply to apply the solution to the cloth and wipe on directly. Remember to dry and don’t let any liquid pool on the screen surface.
General Glass Cleaning Tips
When approaching your glass surfaces on your car, here are a few further tips to help you along to doing a better job:
1. Don’t Forget Window Tops
We did touch on this further above, but don’t forget to clean the tops of the windows when you’re tackling the door windows. To get them absolutely clean and bright again, you’ll have to make sure they’re upwardly extended all the way to the top. Then, use your cloth and cleaning agent to get a good coating along the top ridge. It’s important that this part is cleaned because it’s often neglected and so gets a serious buildup on its surface.
2. The Drying Rule Still Applies
If you’ve learned before about properly washing and detailing your car, then you’ll know already that drying is just as important as the washing part because if you don’t then you’ll leave watermarks. The same is true of the window cleaning part.
First, if washing with car shampoo to get excess mud and dirt off, ensure that you dry the windows thoroughly with a microfiber towel. After applying and using the additional cleaning agent, you should also properly dry the surface with a fresh microfiber towel to prevent any streaks from forming.
3. The Cloth Rules Also Still Apply
Further above we mentioned the problem of using sponges and household/bathroom towels to clean and dry the car. These surfaces are typically dry, abrasive and can do damage to the glass surface. This is doubly true for windows that have a tinting film on them. The abrasions can cause the film to weaken and eventually even start peeling off.
Use short-pile microfiber cloths/towels on your glass. The softness is suitable, but they’re also absorbent and great for cleaning. You should really keep a large stock of these towels in your garage for car cleaning. You can wash them right after and re-use them, and they’re inexpensive to purchase.
4. Work Outside-In
It’s the logical way around to attack the glass, start around the outside edges and then work your way into the center. By spraying at the edges first and then working in, you can be sure to get the entire surface evenly covered and properly cleaned. Sometimes when you work the other way around, you get dirty and unsightly edges that are missed.
Open the car doors to get the best results on door windows. When the door is closed, it can be very tricky to get at every part of the glass as it sits in its frame.
5. Change Direction for Interior/Exterior (identify shortcomings)
Here’s a good tip for cleaning the outside and inside of your glass surfaces that have two sides. When you’re cleaning the outside part, go either horizontal or vertical, but stick to the same motion the entire time. Whichever you choose for the outside of the glass, choose the opposite for the inside of the glass.
By doing this, if you spot streaks or imperfections, you’ll always be able to know instantly if it’s on the inside or the outside of the glass from the directions that those streaks are going. It does require you to remember which one you used for which part of the glass, of course.
6. Make Use of the Heater
Professionals have learned that if you want to get the solvents in your cleaning solution to flash off even more quickly than usual, then the best thing to do is to turn on the heater for a short while and warm up the windows from the inside. A slightly warm surface is apparently much better for gaining the best-possible cleaning effect. Even just a slight temperature increase is effective.
7. Don’t Miss the Mirrors and the Headlight Covers
Finally, we did mention this further up, but we think it’s worth reiterating in the tips that when cleaning auto glass, you shouldn’t neglect your mirrored surfaces and headlight covers. As you lovingly finish cleaning the windows and windshield, turn instantly to the reflective surfaces and lights. They need the same treatment.
Conclusion: Ignore the Glass at Your Own Peril
When we use our windshield washer fluid to clean off some gunk on the windshield, it becomes easy to forget just how much dirt, grime and other components build up on our vehicle’s glass surfaces. Furthermore, these surfaces being dirty doesn’t just pertain to our car’s looks, but also the overall safety of the vehicle when driving.
It’s fine to spend time getting your car’s paintwork shiny and glorious, but don’t forget to give a thought to the often-neglected glass surfaces in your car. Their gleaming cleanliness will bring you as much good as any other, plus in many ways they’re easier to look after than those surfaces with base coat and clear coat.