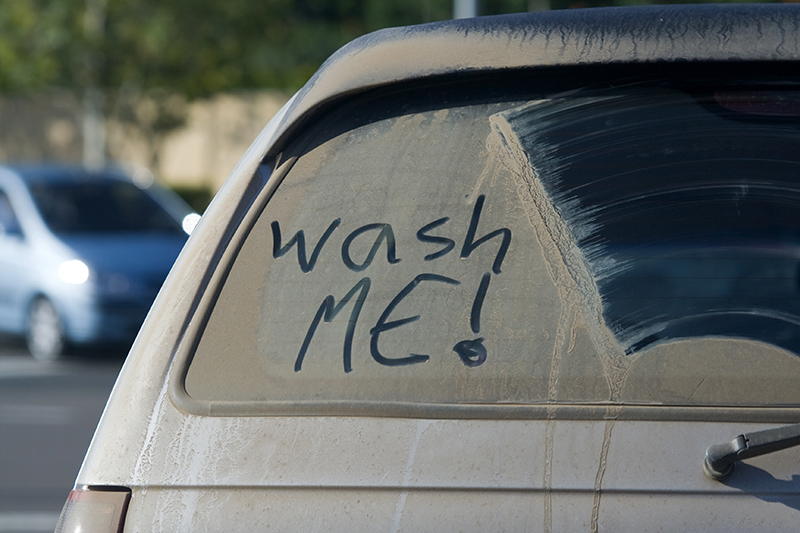
We’ve all done it; peeked out of the window at our car on the driveway and seen how it gets dirtier day by day. What’s worse, we’ve all done that and then procrastinated on cleaning it. Washing the car can feel like a huge chore, it’s true, and the dirtier it gets, the bigger that chore becomes. But there’s another angle to this problem, too. Many of us have washed a car in our lives at least once, but every time we have, we may have been disappointed that we can’t seem to come close to the effect of those professional detailers you see at car washes and on YouTube videos. They make it look so easy and get incredible shine every time.
The truth is that the level and quality of the professional detailer is more within your reach than you first supposed. With the help of the right equipment and just a bit of know-how, you too can learn to clean and detail your car like a pro. Today we’ll present the process to you in four complete stages — Preparation, Knowing the Common Mistakes, Washing & Detailing, and finally Car Detailing Hacks for the Interior.
Let’s get started!
Stage 1: Preparation
As you prepare to wash your car, there are a few ground rules that you’ll need to establish for yourself and anyone helping you out.
Ground Rules:
Rule #1: Pick a shaded spot – washing the car in direct sunlight means the surface of the car will be warmed up. This means that any water (and soap) on it will evaporate quickly, leaving unsightly watermarks. For the best results, you should avoid washing your car at all during the hottest parts of the day, so pick a time earlier in the morning, or late in the afternoon.
Rule #2: Only clean, fresh supplies will do – do you have a bottle of car washing shampoo that has been sat in your garage for several years? How about an old rag or microfiber cloth that was set aside and used a couple of times for cleaning the car in the past? All of these products need to be set aside. Pro-level car washing demands fresh, clean products to avoid any risk to paint damage. Clean sponges, cloths and fresh cleaning products, please.
Rule #3: Don’t drop anything before you wash – all cleaning supplies, especially those which will touch the surface of your car, must never come into contact with the ground. Falling on the ground increases the risk of picking up contaminants that will then transfer onto your car. Even worse, you could pick up some hard debris or powder from the floor that could scratch the paintwork when the cloth or sponge is rubbed over it.
Rule #4: Have a separate set of cleaning stuff for wheels – you should never clean the car with the same gear as you cleaned the car with. When you clean the wheels, your cloths/sponges will pick up brake dust, which contains tiny shards of metal. You don’t want these anywhere near your paintwork. Use separate supplies then turn to the wheels last.
Preparation Steps:
Now that we are all well versed in the rules of car washing, we can prepare our equipment and ourselves for the task at hand.
Step 1: Position your car on level ground
From the ground rules, we already know not to put the car in sunlight or wash it during the hottest parts of the day, but you should also remember one more thing. Try to find a nice, level surface with plenty of space surrounding the car. The driveway is obviously ideal, but any asphalt or paved surface will do. Try to avoid any location where the ground is loose or dirty.
Step 2: Find good positions for your supplies
You need to keep your cleaning gear within easy reach, but not in a place where you’re going to trip up all the time. Remember to keep your wheel cleaning materials separate from the others. If you’re using a hose to do the rinsing, you should also prepare this by unreeling it and making sure there are no kinks. If you are using buckets only, then you should have at least two buckets at the ready, but ideally three (more on that in Stage 3). A hose is best, of course, since it’s a convenient supply of fresh, clean water — ideal for rinsing.
Investing in some kind of multi-level or compartmented cart would be a great idea if you have a place to store one. This can keep all supplies separated, but still in one easy-to-reach place that you can also easily move about the cleaning site.
Step 3: Buckets and sponges at the ready!
Once your arsenal of cleaning products is ready to rock, you just need to prep your buckets and washing gear (sponge, wash mitt, chamois leather, microfiber cloths etc.) as a final step. If you’re using two buckets, then fill one halfway with clean water, and the other with clean water and your chosen soap. If you’re using a third bucket, then the third one is for wheels, you can prep that one separately (see more in stage 3). Remember that you’ll have some sponges/cloths for washing, and others for drying, and still further others for the wheels.
Step 4: Get yourself ready
Now you’re prepped and ready to go, but you just need to perform some final checks on yourself. If you wear any kind of jewelry — ring, watch, bracelet, necklace etc. — then you need to remove it in case it accidentally scratches the paint as you work. Finally, try to remove as many of your added effects from inside the car as you can – clear out any trash, papers or other objects you’ve left out, including air fresheners. This will help when you get to the interior cleaning stage.
Step 5: Pre-washing rinse
This step may seem a little odd to the uninitiated, but to ensure a professional-quality finish and to further lower the risk of any damage being done to your car’s paintwork, it is advisable to give the car a rinse. Use the hose and rinse the car all over, including the wheels. This part of the process will help by removing any small (but potentially damaging) bits of dirt, grit and other small debris that may have found its way onto your car during your recent trips. After a rinse, it’s much safer for you to begin the washing process.
Stage 2: Knowing the Common Mistakes
You’re all prepped and ready to go now, but now would be an opportune moment to reflect on the following common mistakes that people make when they are washing their cars. Keep these in your mind as you get started so that you don’t repeat them:
First mistake — cleaning the car body from the bottom up
Starting at the top of the car, the roof, when cleaning the car’s body seems counterintuitive to many because it’s the most difficult part of the car to reach. That makes sense, but what makes even more sense is that starting at the roof is the only logical way to clean. If you start at the bottom and work up, it may be easier for you physically, but don’t forget in which direction the water and soap will be flowing once you start wiping. Let’s say you’ve started with the car doors and you’ve got them all cleaned up. That’s lovely, but now you get to the roof, all that dirt-filled water is going to flow from the rood right over your newly clean doors. Start from the top.
Second mistake — trying to clean with dry cloths
Never, and we repeat never try to do cleaning with dry cloths. An effective cleaning process needs at least some degree of lubrication. When you try to clean with dry cloths you run a huge risk of scratching since you’ll be dragging any hard dirt particles along the surface as you wipe.
Third mistake — using dish detergent
You may think to yourself that dish detergent is used for cleaning so what harm could it possibly do when cleaning my car? The clue is in the name, this product is designed for use on dishes, pots and pans, not on car paint. Typical dish detergents are not pH balanced and their ingredients will work to remove not only your car’s wax coating, but even its clear coat. The clear coat is the paint’s last line of defense. Damage it and you leave your car fully exposed the elements. Absolutely no dish detergent should come anywhere near your car cleaning supplies.
Fourth mistake — drying with the wrong equipment
Some people make the mistake of forgetting to dry their car at all, but at least all they’d be left with is annoying water marks and a need to repeat the wash. If you use the wrong things to dry, like old t-shirts, used rags, paper towels, scrubbers etc. then you could even put scratches or swirl marks on the paint. Any drying should only be done with microfiber cloths (see stage 3).
Fifth mistake — using a dropped sponge or cloth
If any of your cloths, leathers, sponges or other wiping gear drops on the ground, then it’s officially “dead” to this wash. Treat the ground like a game of hot lava. Once it has touched the ground, it has burned up and can’t play anymore. Even a second or on the ground means it could pick up gravel, dust or other harmful debris.
Sixth mistake — cleaning in a circular motion
When you see people washing cars on TV and in movies, they move their sponges in a circular motion. This may feel natural to you, too, but it’s not the best way to go. The best action to take is to do all your cleaning in one, sweeping direction, such as front to back. Wipe in the same direction for each attack on the dirt, and you’ll reduce the risk of swirl marks and other potential damage.
Keep these at the front of your mind as you wash, and you won’t go far wrong.
Stage 3: Washing & Detailing
So, now we come to the feature presentation – the washing of the car. We’ve prepared a cleaning order to follow that will assist you in efficiently achieving the same finish that a professional detailer gets.
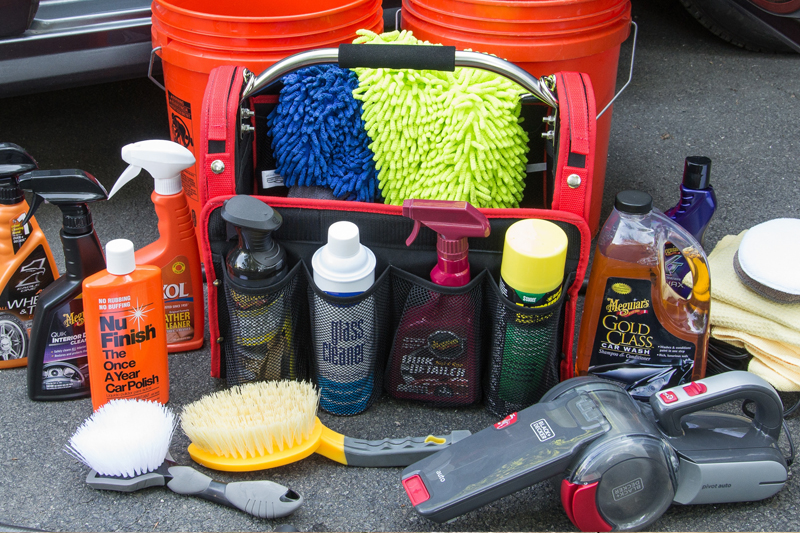
Quick equipment check: three buckets (or two), one with soapy water (car soap, not dish detergent), one with clean water and one separate for the wheels; at least three clean sponges, microfiber cloths, washing mitt and chamois leathers; wheel cleaning solution, soft-bristle brush, car wax and detailing clay bar. For the interior — hard-bristled brush, vacuum cleaner, old socks, glass cleaner, upholstery/leather conditioner and more dry, clean cloths.
Washing Step #1: The wheels
Your pre-wash rinse included the wheels, and we’re going to start the washing there. Why? The wheels can be a messy job, and you’re bound to get some soap and other product on the car’s wheel arches, lower body, and possibly even higher up. It makes sense therefore to get the wheels done first. The wheels bear a lot of the dirty brunt, so they often need a lot of elbow grease to get right.
Take your wheel cleaner and apply it to the entire rim, making sure to get into all the nooks and crannies. Once applied, leave it to sit for about 60 seconds, but not much longer than that, otherwise it can start to do harm. Next, scrub your wheel with the soft-bristled brush and then rinse off thoroughly. Check your progress. If the stubborn brake dust or other grime is lingering, repeat the process until it is all removed.
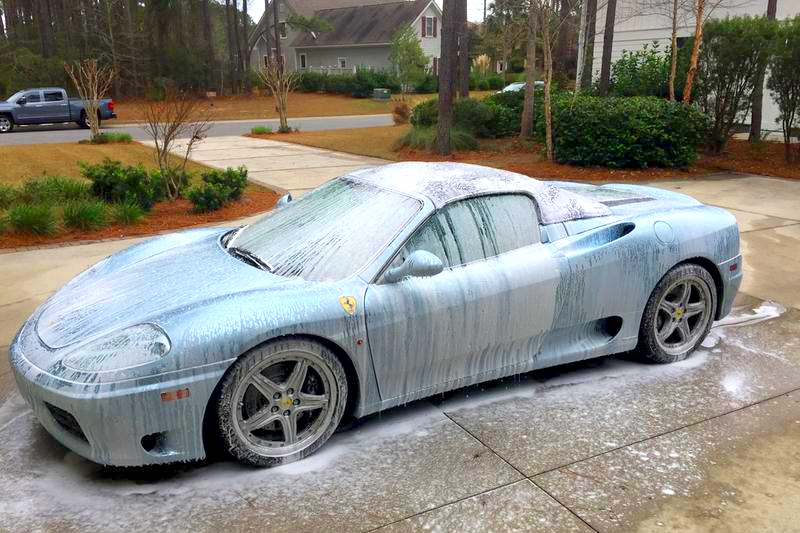
Washing Step #2: Second rinse and car body wash
Your wheels are clean now, and you can return to them after during the waxing stage, but now rinse off your car one more time so you can start work on the body. Take your two remaining buckets and a clean sponge or washing mitt and get started. Apply the soapy water to the body of the car, starting at the top and working your way down. Each time you are done with the wiping, clean off the sponge or mitt in the clean water bucket. Remember to change the water in that bucket once it gets too dirty. You may have to change it several times.
It’s a good idea to tackle the car cleaning in sections. You could start on the roof, then move down to the hood, then across the windows and trunk, and then down to the doors, lower body, bumper, license plates etc. The general plan should be to move from top to bottom, as we mentioned in Stage 2. Finally, don’t forget to move the sponge or mitt in one direction, and avoid swirling actions.
As you complete each section, bring your hose back in to rinse off the excess soap, leaving a lovely clean surface.
Washing Step #3: Drying
The drying stage is very important because it helps to prevent watermarks and will contribute to that supreme-quality finish that you’ve been striving towards. Here are some key things to remember about drying:
- Only use a dry and clean microfiber cloth or chamois – you should have several in your kit. Use each one until it becomes wet and then replace it with the next available dry one.
- Follow the same order when drying as you did with washing – start on the roof, then the hood, then across and so on.
- Also use the same one-direction motion as you did when you were washing, avoiding circular swirling drying motion
- Finally, don’t be tempted by an industrial drier or some other gizmo down the street. Driving there will only mean you get more dirt on the car, and it still can’t beat the hand-dry effect of the microfiber towel or chamois.
Make sure you get your drying done as soon as the washing is completed. If you leave it for any period, some of the water may evaporate leaving nasty water marks.
Washing Step #4: Waxing
One final step, should you want to get a really impressive shine, is to apply wax to both your car and wheels. On the car it will work to protect your paint, and on the wheels, it can help to reduce the buildup of brake dust (though won’t stop that entirely). Nowadays, there are many fantastic waxes that are easier than ever to use, and can offer protection up to 2-3 months. Wax isn’t a shield against strong abrasions or scratches, but it can at least help keep dirt and debris from getting embedded into the paint. Use a detailing clay bar on the surface of your paint before applying the wax. The clay will get out any deeply embedded matter from the paint, thus making the wax more effective.
Stage 4: Car Detailing Hacks for the Interior
Once the exterior is looking all shiny and new, it’s time to turn your attention to the interior. The process is a bit less complex for the interior, since just about everyone can spray, polish, wipe and vacuum. There are a few hacks, however, that will make the job a hell of a lot easier:
Hack 1: Prepping the carpet for cleaning
Dirt gets really stuck into the carpet, and if you don’t have floor mats it can become a real problem. Run the vacuum over it again and again and you may notice no effect. The best thing to do is to agitate the carpet with the hard-bristle brush for a while, and create some static electricity. The brush will loosen the dirt, and the static generated will help bring it up to the top of the carpet hairs. Run the vacuum over it then and you’ll see better results.
Hack 2: Using old socks for cleaning cup holders
The cup holder represents a corner of the car often neglected by owners, but also attracting dust, drink residue (especially from soda or coffee) and other grime. Its shape makes it tricky to clean with regular items, so why not make use of old socks? Take a (clean) sock and put your hand in it, and then you have the perfect-shaped cleaning device for getting all the dirt out of each cup holder.
Hack 3: Use paint brushes to get where nozzles can’t reach
If your vacuum attachments can’t quite get everywhere, then use a long-handled paintbrush to get the most stubborn dust out of its hiding places and out into the open where you can vacuum it right up.
Hack 4: Stickers on the windows? A razor blade will help
Using a standard razor blade from a shaving razor is the perfect way to cleanly and entirely remove old stickers. They could be functional stickers or just something the kids stuck on there. Carefully push the razor’s edge under the sticker and keep pushing until the sticker peels off. It may not come off in one piece but it’ll be cleaner and easier than doing it with your hands.
Hack 5: Toothpaste on the headlights
Okay, this one’s not strictly “interior,” but it’s a handy tip. One of your most unlikely allies in cleaning up a fogged headlight is common toothpaste. Simply rub the toothpaste all over the outer plastic casing of your light fitting, leave for a minute or two, and then rinse off. The effects are stunning.
In Conclusion:
Now that you know all the secrets, you can go ahead and give your car the detailing experience that it deserves. Properly detailing and looking after your car will keep it looking like new, and can ultimately give you great benefits like maintaining a higher resale value. A buyer will always be more interested in a car that has been well taken care of.
Alternatively, you might now be thinking that there’s still a lot more work than you thought. You might, therefore, be thinking of taking your car to the detailers next time you have an opportunity. We have good news for you — you don’t have to! Head to Mobilecarwash.com and book one of our professional car wash and detailing packages and we will come to you. Enquire today and get top-level professional car cleaning service brought right to your doorstep.