In the first part of this two-part article miniseries, we talked about how to build the ideal car detailing kit. Now that you have your kit ready, you’ll want to start detailing. The important question, however, is how you do that. Car detailing is perceived as a much-elevated form of car cleaning and washing. If people just wanted their cars cleaned, they could take them to the car wash or get their kids to wash them for free on a Saturday. Detailing has to contain something more.
There are key skills that professional detailers possess that helps them to create a “wow factor” in their work. It’s a difference that helps people cross the line from paying $10-15 at the car wash to $75-100 for a full car detailing. In today’s blog, we will offer some detailed insight into which key skills it is that helps professional detailers set themselves apart in this way, and how best to learn and practice them.
In summary, here is a rundown of all the skills that we will be discussing in today’s blog:
Exterior Detailing:
- Washing – Two-bucket method
- Drying – Blower vs. Microfiber towels
- Clay – Applying the clay detailing bar
- Prep – Removal of residue and/or repeat washing
- Inspection – Looking for signs of paint problems like swirls
- Polishing – Using an orbital buffer
- Wheels – Thorough wheel cleaning inside and out
- Glass – How to clean windows, lights and other glass
- Protection – Applying wax or paint sealant
Interior Detailing:
- Vacuuming
- Shampooing the carpet
- Treating fabric or leather upholstery
- Cleaning dash and surfaces
Exterior Detailing:
The professional car detailer will begin their work on the car’s exterior, so that’s where we will begin our guide to particular car detailing skills.
Washing
The first fundamental skills you need to know is the two-bucket washing system. This one is well rooted in common sense. The two-bucket system means having one bucket on hand with your water and cleaning agent mixed together. The second bucket will have just water and is used for cleansing your washing mitt after it has been run over the surface of your car to collect the dirt and other contaminants. The result is that you have one bucket of “contaminated” water that prevents the clean water with the cleaning agent from becoming dirty.
That’s important because if you don’t have the second bucket, you just dirty your washing water and end up rubbing the same dirt and grime back onto a different part of the car’s surface. Some people even add a third bucket that they use just for rinsing. If you are using a power washer for rinsing, then the third bucket is largely unnecessary.
Another key skill for detailer at the washing stage is understanding the “geography” of a vehicle. What this refers to is the detailer’s ability to divide each vehicle into manageable sections and perform cleaning steps methodically and evenly across the entire car. Many cars are too large to wash and dry all in one go, especially if you live in a warm part of the world where the sun seems to be actively working against you, causing evaporation on the surface which can lead to an imbalanced drying and the leaving of water and other marks.
Dividing the car into sections and then working through each section in sequence is the key to a high-quality detailing job. For example, roof, hood, door/side panels, wheels, rear end, glass windows.
Drying
As you clean each section of your car, you’ll also have to dry it and that means being proficient in two forms of drying. The first method is using a hot blower of some kind. Some people use leaf blowers, but any kind of blower with adjustable air strength can get the job done. The blower method is a way of getting the surfaces dry without making contact, which is a good way to avoid accidentally scratching or otherwise damaging the surface of your car.
If you don’t feel comfortable using a blower, then you can turn to the second method, which is more traditional and used more widely by detailers, and that’s using a set of large and thick microfiber towels to dry. The first towel should be used to wipe over the car and collect the majority of the moisture, whereas the second towel should be used just to collect any remnants that the (now wet) first towel can’t pick up.
It’s absolutely essential that you use clean towels, and that they be made of microfiber. The only other viable alternative that you could turn to is a chamois. These are also made of a soft, absorbent and car paint-friendly material that works well for drying. Detailers in 2021 tend to prefer microfiber because of its ultra-soft touch and absorbency, and also the ability you have to wash and reuse them.
One thing to watch out for when using washed microfiber towels is that the microfibers themselves haven’t become frayed or worn. Ensure that you purchase quality towels if you’re going to use them more than a couple of times. If you buy cheaper towels, then you may only get a handful of uses and washes from them before they turn from a microfiber towel into a frayed liability.
Clay
Once your surfaces are washed, rinsed and dried. You might make the choice to repeat that cycle once more to get a really clean surface before moving onto the next stages. This is quite normal, so if you look at your washed/dried car surface at this stage and can still see dirt, grease or other contaminants that you want to remove, then go ahead and repeat the first washing and drying stages.
Next, however we come to the application of the detailing clay. This tool often comes across as a little intimidating to first-time or beginner detailers. They often wonder how this putty-like adhesive substance is going to do any good for the car. It seems counterintuitive to take something like that and rub it with gusto all over your car’s surface. That’s why learning how detailing clay works is very important.
First of all, you don’t just take the clay and start smearing it on the car’s surface. The very first thing you need to do is check to see if you need clay at all. Since detailing clay is designed to get at the smallest, most stubborn and most deeply embedded contaminants in your paint surface, you might wonder how you’d even know that you need it. The way to check is to lightly run your finger across the freshly washed surface (not too hard, you don’t want fingerprints) and see how it feels. If there is any roughness, then you need to use clay.
Detailing clay works along with a special accompanying lubricant. You first apply the lubricant generously to the surface, working in manageable sections. For example, do half the hood in one application, then move to the next half, and so on. You then move the clay over the well-lubricated surface in straight lines, not in a circular motion. Not moving in a circular motion seems counterintuitive too, but it’s the best way when you’re scrubbing with the clay bar.
Each clay bar that you have should be enough to detail about 20 vehicles, depending on what brand you use. Chemical guys do a particularly good-value and effective clay bar, the application of which you can see in the video below.
Prep
After applying the clay bar, we now come to the “prep” stage of the detailing process. This is where a detailer starts to prepare the car for the application of paint protection. The first skill you need here is wiping each section of the car to remove residue. In particular, you are trying to remove any and all residue that might have been left behind after applying the detailing clay.
For this you can use post-clay spirits to clean the paint, or you can actually perform another quick wash and rinse if you want. Before we move into the realms of paint protection, it’s important that you learn to detect and manage signs of residue. Use your finger once again to run over the surface of the car and feel for any roughness or unevenness. The clean and clay-treated surface should be totally smooth to the touch. The best way to do this is by wiping each section down immediately after you use the clay bar. This saves time and may even remove the need to do another wash and rinse.
When it comes to polishing and paint protection, you have to be working with absolutely clean and smooth surfaces. Only in this way will the wax or sealant be able to properly bond with your car’s paint surface or clear coat.
Inspection
At this point you have to make use of your LED light that we mentioned in part 1 of this article min-series. If you have a Xenon light, it would actually work equally well for this task. Using your special and powerful lamps, you need to run across the car’s surface and inspect the surface for signs of paint imperfections.
What you are looking for here are swirl marks, micro-scratches, and any other sign of paint trouble that you might not otherwise detect with the naked eye under normal light conditions. The trouble is that our eyes become so used to seeing our paint color and condition that it is quite easy for us to miss imperfections, especially when the car is dusty or dirty.
Now that you have cleaned, dried and applied the clay bar to your car’s surface, you should be able to shine a light and see rather clearly where there are places that need paint correction. Just as the car needs to be clean and contaminant free before applying wax, paint sealant or ceramic coating, the paint surface must be as even and without blemish as possible.
If you detect a more serious paint problem like a small chip or a sign of peeling (even on a small scale) then you might have to conduct a minor paint correction with a DIY paint correction kit before proceeding to the next stages. More serious paint issues like chipping are typically detected before it comes to detailing, but you need to be ready for anything as a detailer.
Polishing
After conducting your inspection, you might have to carry out a polishing and buffing stage to remove scratches before the paint protection stage comes up. The key skill you need at this stage is using a dual-action polisher. The dual-action polisher is the best one to use when you’re detailing because not only does the main rotor spin to provide that important circular motion, but the polisher has an off-center connection that shakes the backing plates, creating further small circular motions as the main rotor spins. This is the best kind of action for polishing.
When using the polisher, one sub-skill is keeping the buffing pad flat and steady. This has a lot to do with the way that you hold and move the buffer. The key thing that some detailers don’t realize is that a dual-action polisher is best used to apply the polish, and not to remove it.
After applying the polish to the surface with your polisher, then you should use a high-quality microfiber towel to wipe the surface. If you use one towel, wipe it once on one side, flip the towel and then finish with a clean side. You could also use two towels.
For a real professional finish on the polishing stage, you can use a two-stage polishing method. The first stage is the compound, which is the first stage where you use more polish to clean off the bulk of any scratches and swirls that might be on the paint’s the surface. The next stage is using a high-grade polish like Meguiar’s Ultimate Polish. In the second stage, you’ll use less product and less time to apply and remove, since it’s just a finishing stage.
Wheels
Before we get to paint protection, we want to cover both wheel and glass detailing. First, for your car’s wheels, to get the best results, you’ll need to be able to remove your car wheels and clean them individually and separately in a dedicated space. Removing the wheels can be quite a hassle, especially if you’re detailing at a remote location, which means you’ll have to bring a way to raise the car up so that you can remove and clean the wheels.
One reason for doing it this way, however, is firstly so you can use your wheel cleaning brushes to get into every corner and every part of the wheel for a thorough cleaning job. The second reason to do it this way is so that you can clean the wheels without disturbing the rest of the detailing job you have already finished.
It should be pointed out, therefore, that if you don’t plan on removing the wheels, you should clean them first. Our detailing intuition tells us that it’s logical and right to start the cleaning job right at the top of the car and work down. This is mostly true, but when you leave the wheels until close to the end, and you’re using a power washer, it’s very easy to blast dirt, grime and brake dust from the wheel onto the other freshly-detailed sections of the car.
Learn to use synthetic sealer and wheel-specific cleaning products to get the best results on your wheels. Using synthetic sealer in particular will help them to stay clean and protected for longer than from just regular washing. That’s the auto detailing difference.
Glass
When cleaning the glass, you should first go back to an earlier step and consider using the detailing clay bar to get great results on glass surfaces. The clay is absolutely safe to use on glass, and that includes your windshield, front and rear passenger windows, the car’s rear window, as well as the casings for your front and rear lights. Any clear glass or plastic surface that needs to remain clear should be treated with the clay first of all.
Once you are sure the glass is dust and contaminant free, you can treat the glass surfaces with a non-abrasive sealant or cleaning agent designed for that surface. There are plenty of products on the market designed especially for the treatment of glass and hard plastics. Treating the glass with such a product once again is what really sets you apart as a detailer.
A car washer can just wash and dry the glass normally and then perhaps use Windex or something similar to get a nice shine on the glass. Those results are fine and worth the $10-15 fee you’d pay the car washer. If you’re a detailer, however, you need to elevate the experience for the customer. Treating the glass as we described above adds extra protection, especially from UV rays. It will also make the surface very slick, which allows future water and dirt to bead and slide off more easily, keeping it clean for longer.
Protection
Finally we get to the stage of paint protection. Here you have several options to use from your detailing kit. Broadly speaking, there are three common choices:
- Natural waxes
- Synthetic waxes or paint sealants
- Ceramic coatings
You can make use of your dual-action polisher again — remembering of course to always use a clean pad with every new product that you’re applying — to apply a layer of wax. The first skill is evenly applying a layer of wax either by hand or with a polisher. Using the polisher will be faster, but many skilled detailers prefer to use a straight-line style application rather than any kind of circular motion. In this case, they need to apply the wax by hand.
While you are waiting for the wax to cure, you can start work on the interior detailing (see below). If you are not going to apply wax, then another option is liquid synthetic wax or paint sealant. The gift of these products is usually better chemical protection for your paint, but sometimes at the cost of the warm shine. For these, apply the liquid wax using either the spray applicator (easier) or by first pouring a blob onto a clean rag or applicator pad and then applying in even, rectangular straight-line motion.
For sealants and ceramic coatings, the majority of modern products are now made with spray applicators, which makes life a lot easier when it comes to getting an even coat. The skill of even application of paint protection products is another key skill that one needs as a detailer. Uneven application makes removal harder, but also leaves an imbalanced protective effect. If you don’t feel confident with wax or pure liquid application using an application pad, then favor the spray bottles instead.
Interior Detailing:
Application of paint protection, especially wax, is the natural juncture at which a detailer might get started on the interior part of the detailing job. Car wax can take a number of hours to properly cure, and so it’s ample time to get started on your interior.
Vacuuming
Using the vacuum cleaner effectively as an auto detailer is about firstly making use of all the attachments at your disposal. A good car vacuum that you hopefully have in your car detailing kit will come with various attachments to help cleaning different surfaces, but also to get into the various interior spaces like the vents, under the seats, into the storage spaces and every dark recess that a typical car washer might not even think to look.
One great skill that good detailers know is agitating the carpet using a stiff brush before applying the vacuum. The motion of the brush and the static electricity that you create help to loosen and bring any dirt up to the surface. You can then simply vacuum up the dried dirt. Doing this saves you from overusing shampoo and other carpet treatment products. If the dirt is dried on or embedded in the surface, you can do the same on cloth upholstery, but it’s most effective on the car’s carpet.
An optional trick you might use after vacuuming the vents is using compressed air blown into the vents to remove more deeply embedded contaminants that can otherwise cause bad odors in the vehicle. This won’t be necessary on every job, but can be a neat trick for those select vehicles that are a bit older and whose vents haven’t been cleaned in a long time.
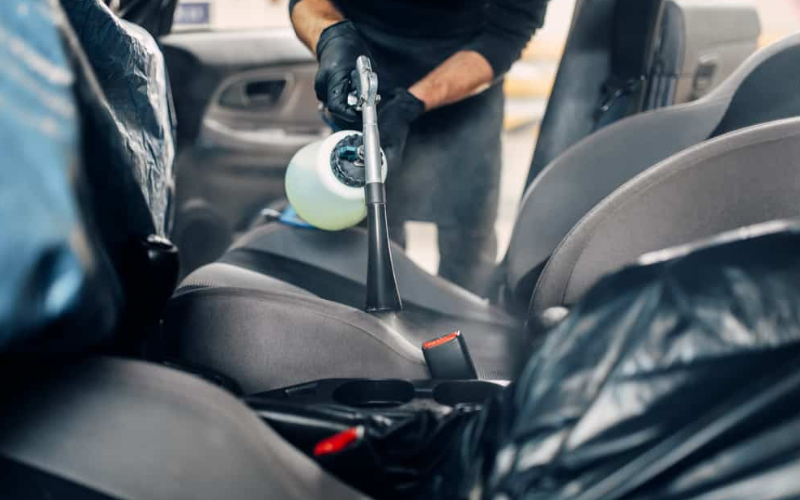
Shampooing the Carpet and Upholstery
The next task you’ll need to undertake is cleaning the carpet and upholstery. For this you’ll need to practice even and proper application of carpet and upholstery cleaners. This isn’t too hard and you can just follow the instructions that are given to you on the particular product you are using.
One thing here is to once again stick with car-specific products. It’s tempting just to use household detergents, which on carpets might not be as bad as using dishwashing liquid on the car’s paint, but the fact remains that it’s still not designed for optimum use on a car’s carpets. Instead, use a proper car carpet shampoo or upholstery cleaner which is designed to work with those typical fabrics that car carpets are made from.
The key is not to overuse upholstery or carpet shampoos. Use them sparingly and let them do their work. If you have done a proper and judicious vacuuming and pre-vacuum agitation of the carpets and upholstery, then the remaining cleaning should be very light-duty in nature.
Treating Fabric or Leather Upholstery
When it comes to treating your car’s seats, be they leather or fabric, the important thing is to use products that are appropriate for their material type. If you have leather seats, then use proper leather conditioner to clean them. If they are a mixture of Alcantara and leather or cloth, then you’ll have to be smart and careful in how you apply your various products. The important skill is using the right product on the right fabric.
As with other surfaces that you’re working on in the car, ensure that you use clean cloths when applying and removing things like leather conditioner. It’s important not to cross-contaminate your cleaning cloths.
Cleaning Dashboard and Surfaces
Finally, cleaning the dashboard doesn’t necessarily need any particular skill, but there is some knowledge to keep in mind. The first thing is that you must tailor the dash cleaning product to the main dashboard material. For instance, if the dash is made from vinyl, plastic or rubber, then it calls for milder cleaning products. A skilled detailer might even stick to making their own using 2 cups of water mixed with 3 tablespoons of vinegar, half a teaspoon of detergent and half a teaspoon of oil-based soap. That will be mild and effective enough to clean these types of dash.
If your dashboard is leather, then the best policy is to avoid detergents of any kind and just wipe it clean with a damp microfiber cloth. They key ingredient to always avoid with your dash, especially when it comes to your infotainment screen and other electronics, is ammonia. If there is ammonia in any of your chosen interior detailing products, then think again.
Conclusion: If You’re Going to Detail, Detail Right
At the end of the day, car detailing is a serious profession. If you want to be good enough to do the job, make money and earn a positive reputation among your customers, then you have to be able to demonstrate the main skills necessary to do the job correctly. Competition among detailers is only getting fiercer, with each one trying to outshine the last. Without this fundamental skill set mastered, you’ll struggle to get to the top of the pile in the detailing world.