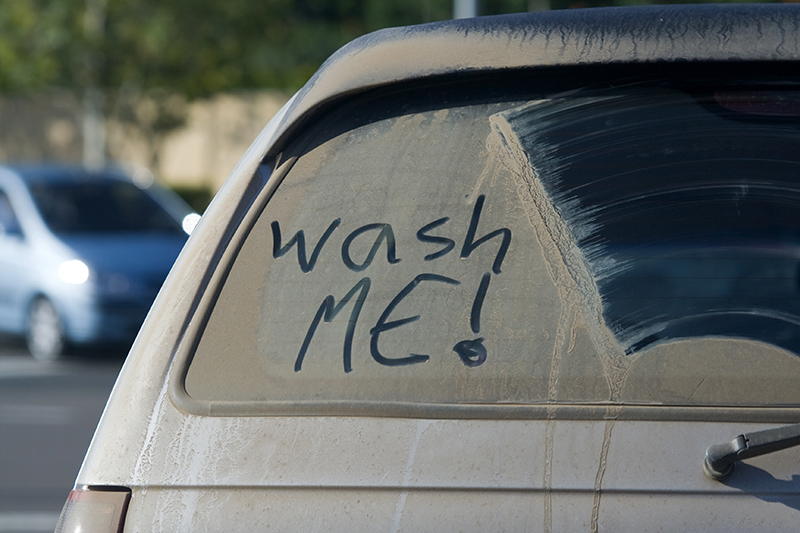
The common “car wash” is no longer good enough for many of us. We want a more premium experience, and apparently many are willing to pay for it. The cost of detailing can easily reach the hundreds of dollars, depending on what “level” of service you seek. For others, however, this premium is a little too rich. That doesn’t stop them from wanting the irresistible and restorative results that detailing can bring to their cars, though.
DIY detailing is more possible than ever thanks to the growing market of increasingly affordable consumer products coupled with the plethora of video-based “how-to” guides that teach us how to use them properly. Unfortunately, none of this removes the unfortunate errors that many DIY detailers still make that can actually bring harm to their vehicle rather than good. In today’s article, we’ll be exploring those mistakes and why they must be avoided.
1. Using Wrong Cleaning Detergent
When you employ your consumer-savvy brain, you might look at car shampoos and other cleaning products and think of them as a kind of scam. You may imagine a production line in which a single cleaning product is produced but then bottled differently for distribution across the world to different companies, including providers of car shampoo. This couldn’t be further from the truth.
Detergents are manufactured specifically to clean the thing they are marketed for. They may look and even smell similar, but their specific function and exact makeup are different. Dishwashing soaps, for instance, contain harsher chemicals that are fine for washing stubborn stains from plates and pans, but will work too aggressively on your car’s surface, stripping away wax layers and other protective finishes. These products are specifically made to combat grease and wax in your dishes. They don’t distinguish between the waxy congealed grease on your roasting pan and that wax which is there to protect your car.
The lesson? Always stick with proper car care products that are manufactured with your car and its delicate balance of paint and other coating materials in mind.
2. Detailing in Direct Sunlight
You might see detailing as a kind of leisure activity; something to do on a Sunday afternoon on a nice sunny day in the yard. It sounds perfect, but creating hot conditions for the car while you’re trying to detail effectively is actually a very bad idea.
The first mistake is detailing the car in direct sunlight. The sun’s UV rays bearing down on the surface of your car simply heats it up, and that will hinder your progress. As you’re washing, the sun’s heat may dry the surface of the car before you get around to drying it yourself with a microfiber towel (see more in point 3). This will leave water spots on the surface and just force you to do it over again. It’s best, therefore, to wash the car in a covered or otherwise shaded area to keep the effects of the sun’s rays at bay.
Another mistake in this realm is washing the car very shortly after a journey that has warmed the car up. If you’re just been driving the whole morning, it’s imperative that you let the car cool down before you attempt any detailing.
3. Leaving Hard Water On Car Paint
Two common mistakes occur on the subject of drying the car after detailing it. The first one is the most serious; forgetting completely to dry the surface. You should always have a clean microfiber towel at hand with which to dry the car after you’ve finished the washing stage. Leaving the water to its own drying devices will inevitably leave water marks, streaks and other unappealing results that are hardly fitting for a detailer’s work.
Another issue is with misusing the drying towel as a cleaning implement. Let’s imagine you’ve completed the washing stage of your detailing and you notice a bit of stubborn dirt that didn’t get washed off. You pick up the drying towel and forcefully wipe it away. This is a mistake for a couple of reasons. First, the drying towel has to be kept as clean and contaminant-free as possible, so wiping dirt away with it is not a good idea. Second, the forcefully scrubbing at such embedded dirt with any kind of cloth risks dragging that dirt across the paint and causing scratches.
Deeply embedded contaminants are best-removed with a detailing clay bar and lubricant. This tool glides over the surface, removing the most stubborn dirt without risking any damage to your paintwork. Professional detailers swear by them.
4. Using the Wrong Glass Cleaner
Next, we’re turning to the glass elements of your car. Once again, there is a common error involving other household products that we assume are safe for our cars. If you ever look carefully at a professional detailers kit, they will not have anything like regular Windex or another similar product. Why? One ingredient is key — ammonia. This is a common ingredient in household cleaners, and it’s very effective in its own world. For car interiors and upholstery, however, it can be quite damaging. Therefore, you should avoid using any cleaning product with ammonia. Fortunately, there are plenty of ammonia-free options out there that will get the glass gleaming properly again.
5. Buying Excess Products
It’s easy to fall into a spending trap when you’re trying to emulate the work of a professional detailing outfit. If you see detailers have certain tools or specific brands of cleaning products, then you assume you must also invest in the same materials to get those kinds of results. This is a mistake.
The car washing detailing industry is huge now, worth $10 billion dollars according to estimates from IBISWorld, and employing some 187,000 or more people. One of the reasons it has become such a valuable industry is that it has become adept at overselling its products, especially to amateur detailers who have no real need of them.
As an amateur detailer, you have no need for things like a foam cannon, industrial pressure washer, or waxes that cost hundreds of dollars. These are items in which professional outfits might invest to add a more “premium” sense to their service targeting high-income individuals, for example. Start with simple, more everyday commercial items and master your skills first, and you’ll still see magnificent results.
6. Applying to much Wax
When you’re new to the world of waxing, some erroneous assumptions can easily occur. Probably the most common one is that of amateur detailers assuming that if two coats of wax provides a better protective effect than a single layer, then surely four coats would be twice as good as that, and would last longer, right?
This is not the case. The first layer of wax serves as the principal coating that protects and shines. The second coat you apply is more of an insurance, that ensures you’re covered by filling in any areas that are insufficiently waxed. The two-layer approach is solid, and once buffed will leave your car with an irresistible showroom-quality shine. Keep adding the layers, on the other hand, and all you’re really doing is throwing that good wax away.
Additional layers of wax are more-than likely going to fail to bind with anything, and subsequently will be cleared away as you buff the wax layer to get the glorious finish you seek. Therefore, be economical with the wax and stick to the two-layer rule, or as otherwise instructed by the specific product you are using. When it comes to wax, less is more.
7. Overusing Chemicals
The carpets on your car floor bear the brunt of a great deal of dirt-based abuse. Between the driver and passengers, the carpet is constantly being trodden with dirty shoes and boots, as well as having garbage and other items casually thrown onto it without proper consideration. It’s the real “trooper” of the car’s interior.
When cleaning the carpet, many of us make the mistake of going at the stains and dirt too aggressively with our various carpet-cleaning chemicals. We think we’re doing the carpet good by dousing it in chemicals and soaps and then leaving them to soak in and work. Sometimes we then don’t wash them out properly, but never think that it could be a problem. The fact is that not washing out the soap can damage the carpet, leaving it even more exposed to dirt and dust.
The main lesson here is that carpet cleaning needs time. An effective vacuum, for example, is always the best place to start, and can remove more of that stubborn dirt than you know. Cleaning as much of the gunk out of there before you turn to the soaps is always the best policy. Afterward, use products sparingly, and consider multiple washes to get the carpet fully clean, always thoroughly rinsing soaps out and allowing the carpet to dry before the next cycle.
8. Waiting too Long to Clean
This one could be argued to be more of a bad habit than a specific detailing mistake, but it is certainly related and relevant to this topic. When you’ve invested in leather upholstery, you get one advantage which is that leather is easy to wipe clean in the event of spills. Cloth upholstery, on the other hand, presents some other issues that can affect your detailing.
You’ll likely include seat vacuuming as part of your interior detailing process, and that’s fine. The mistake happens when drivers leave stains and spills unattended in fabric seats until detailing day comes around. This is not a good idea because such stains and spills can attract mold and pests, depending on what exactly it is. This is one problem that you don’t want to leave until detailing day.
9. Leaving Chemical Cleaners on Interior Surfaces
There are products like Armor All that are touted for the effective cleaning and shiny results on multiple surfaces. While we wouldn’t challenge the cleaning efficacy of such products, we do question their use on certain surfaces in your car, specifically those that your hands or arms are frequently touching.
Which surfaces is it a mistake to use them on? We say: the steering wheel, parking brake (if it’s a pull handle), gear shifter, frequently-used dash buttons. Not only could these products make those surfaces slippery — can you imagine a slippery steering wheel or gear shifter while driving? — but those chemicals then easily get on your hands, which you then may use to touch your face, eyes, or mouth. Any way you look at it, it’s not a good chain of events. Therefore, be mindful of which products you use on which surfaces in the car.
10. Giving Up
Finally, one final mistake that we should certainly cover is how people seem to give up on DIY car detailing when things don’t go to plan. Many aspiring detailers see professionals’ videos on YouTube who make everything look easy. They attempt to replicate the effects and end up disappointed when they don’t get exactly the desired result at the first attempt.
Remember that Rome wasn’t built in a day. These pro detailers started out where you are today, with little to no experience at all. They didn’t just acquire their skills overnight. You too can learn but it will take time and persistence. If something goes wrong, reflect on what that is and try to correct it. Your car is still there, and it’ll no doubt continue to get dirty and require your attention to clean and detail it.
Conclusion: DIY Car Detailing – Proceed with Care
In the end, the main thing is to always read instructions on cleaning products you use, and to furnish yourself with as much knowledge and experience as you can while you learn to detail like a pro. Experienced detailers know all too well that effective detailing is a careful and methodical process in which no step is left done improperly. Stick to those principles, and hone your craft until you too can detail like a pro. Who knows? It could also turn into a great part-time business for you to earn some extra money in the future.